
Wiper Arm Connector Guide for a Perfect Fit
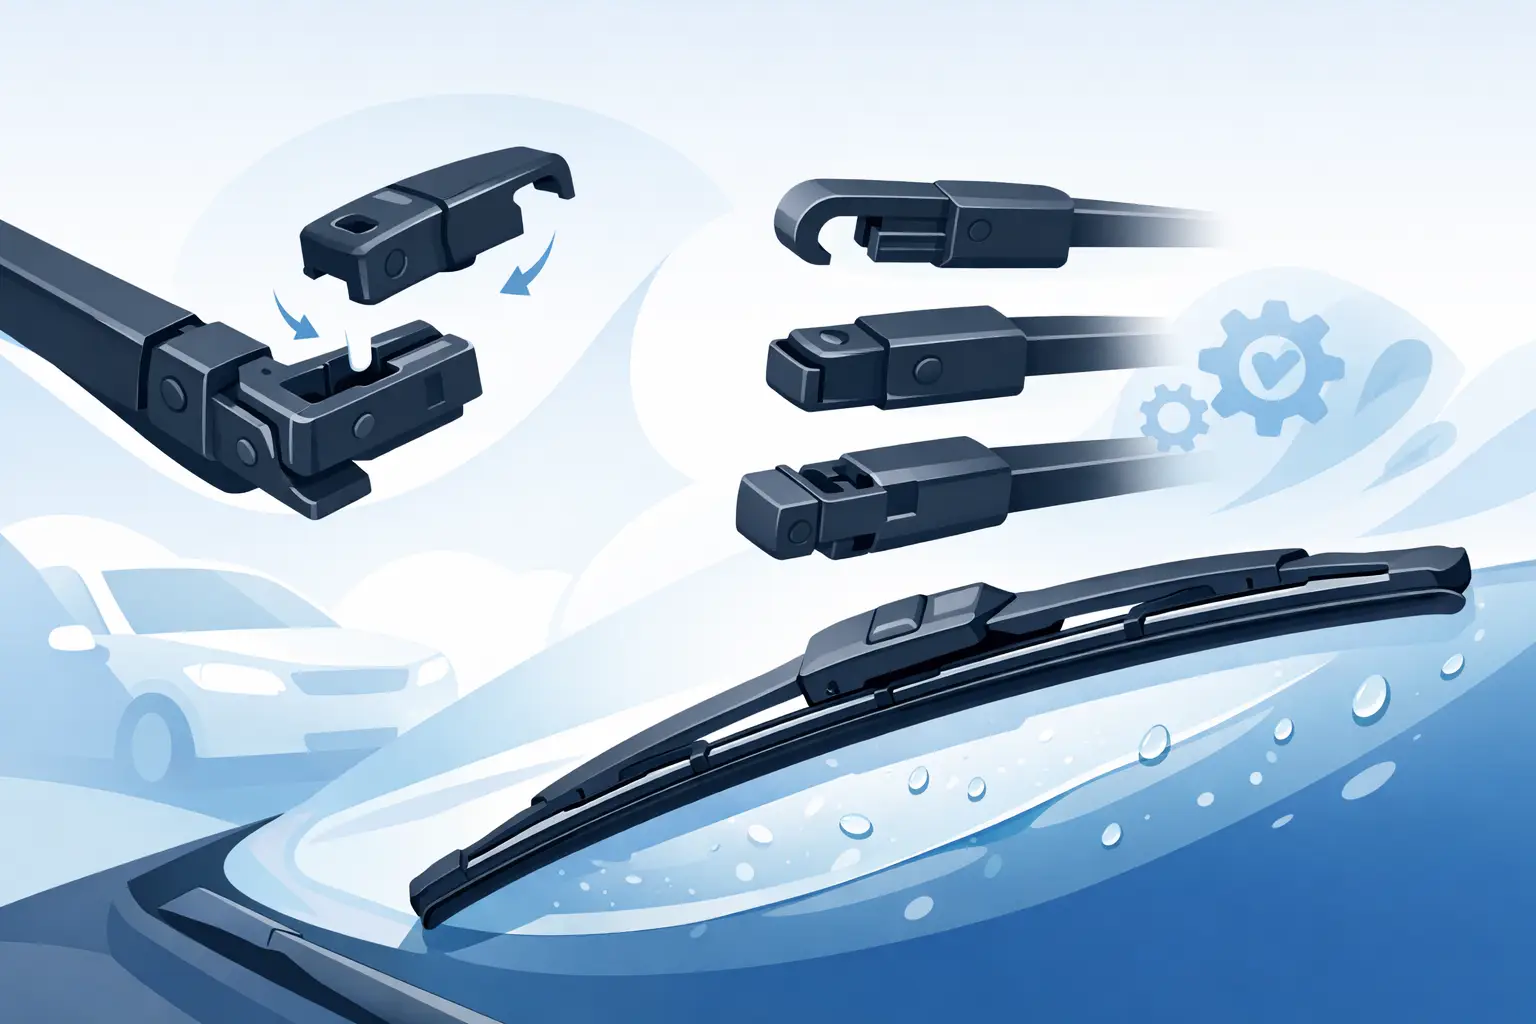
That fresh set of wiper blades will only do its job if it connects properly. This wiper arm connector guide helps you recognise the fitting on your vehicle, avoid forcing the wrong adaptor into place and get back to a clear windscreen fast. No squeaks. No streaks. Just clear views when the weather turns.
A wiper blade is a small part with a big safety job. In a sudden Melbourne downpour, on a dusty regional road or during harsh summer glare, streaking rubber can make hazards harder to spot. The good news is that most blade changes are simple. The part that catches people out is not the blade length – it is the connection between the blade and the end of the wiper arm.
What Is a Wiper Arm Connector?
The wiper arm is the metal or composite arm that moves across your windscreen. The connector is the locking point at its end, where the wiper blade clips, slides or hooks into place. On many replacement blades, this is handled by an adaptor: a small fitting supplied with the blade that matches the arm style on your vehicle.
Connectors are not universal. Two cars can use blades of a similar length yet have completely different attachment systems. That is why buying on size alone can leave you with a blade that looks right in the box but will not lock onto the arm.
The safest shortcut is to select blades by your exact make, model and year. A vehicle-specific kit takes care of blade lengths and the correct pre-fit adaptor, so you are not standing in the driveway comparing tiny plastic pieces while rain rolls in.
Common Wiper Arm Connector Types
You do not need to be a mechanic to identify most fittings. Lift the arm away from the glass and look at its very end, not at the blade itself. Take a clear photo first if you are unsure. It makes comparing the shape much easier.
J-hook or U-hook
The J-hook is one of the most familiar designs, especially on older passenger cars, SUVs and utes. The end of the arm curves like a letter J or a shepherd’s hook. The blade adaptor usually slides onto the hook and clicks into a locked position.
Although it is common, J-hook arms still come in different widths. Do not assume every hook adaptor fits every hook. The correct blade should slide on without excessive force and give a clear click when it locks.
Push-button and top-lock connectors
Many newer vehicles use a flatter, cleaner-looking connector. A push-button arm has a small button or tab that releases the blade. A top-lock fitting often slides into place from the top and locks beneath a cover.
These systems can be quick to change once you know the release point, but they are easy to misread. If the blade will not slide off with gentle pressure, check for a button, cap or locking tab before pulling harder. Forcing it can damage the adaptor or bend the arm.
Side-pin, bayonet and pinch-tab fittings
Some vehicles use a side pin that passes through the blade adaptor. Others have a straight bayonet-style arm that slides into the connector, or two tabs that need to be pinched to release the blade. These are less familiar to many drivers but work just as reliably when matched correctly.
A rear wiper can be different again. Even if your front blades use J-hooks, the rear arm may have a dedicated fitting and blade shape. Treat it as a separate part when checking compatibility.
How to Identify Your Connector Before Ordering
Start with your vehicle details: make, model, year and body style where relevant. A wagon, hatch and SUV version of the same model can have different rear wiper setups. Imported vehicles and facelift models can also vary, so accurate details matter.
Next, inspect the arm end. Is it curved, flat, straight, fitted with a button, or marked by a visible pin? You only need enough information to confirm what you have. Avoid removing the old blade just to investigate if it is still doing its job, particularly if rain is forecast.
Then use a vehicle finder that matches the blade kit to your car. This is more dependable than measuring the rubber strip or trying to identify an adaptor from a blurry catalogue image. Auto Cross matches vehicle-specific wiper blade kits with the fittings required for the job, giving you confidence before checkout.
If you have previously fitted replacement arms, had accident repairs or own a rare imported model, take extra care. The arm may not be the original factory style. In those cases, compare the physical arm end against the fitting information and keep your old blade nearby until the new one is fitted successfully.
Fitting Your New Wiper Blade Safely
Park on level ground, switch the ignition off and make sure the wipers are in their resting position. Lift one arm at a time. Wiper arms are spring-loaded, so hold them firmly rather than letting them snap back onto the windscreen.
For a J-hook, open the blade’s connector cover if it has one, slide the old blade down and away from the hook, then guide the new blade onto the hook until it clicks. Close the cover and give the blade a gentle tug. It should stay locked in place.
For a button, top-lock or pinch-tab connector, press the release point on the old blade and slide it off in the direction allowed by the fitting. Align the new adaptor carefully, then push or slide it until you hear or feel the lock engage. The exact movement depends on the connector, which is why the supplied fitting instructions are worth a quick look.
Before lowering the arm, place a folded towel on the lower edge of the windscreen. It is a simple safeguard if the arm slips from your hand. Never run the wipers with the blade removed – the bare arm can scratch or crack the glass.
Once both blades are installed, remove any protective sleeves from the rubber. Wet the windscreen or use washer fluid, then run the wipers at a low speed. Watch for smooth movement across the full sweep. The blade should sit evenly on the glass, clear water without chatter and return neatly to its parked position.
Signs the Connector Is Not Right
A blade can be new and still perform poorly when the adaptor does not match the arm. Stop and check the fitting if the blade feels loose, sits at an odd angle, lifts away from the windscreen or fails to click into place.
Do not use cable ties, tape or glue to make an incorrect connector work. Those fixes can fail without warning and may leave you with no effective wiping in heavy rain. A correctly matched blade should lock securely with no makeshift parts.
Noise is not always a connector issue. Chatter can come from a dry, dirty or wax-coated windscreen, while smearing may be caused by washer fluid residue or contamination on the rubber. Clean the glass and wipe the blade edge with a damp cloth first. If the blade is securely fitted but still streaks after cleaning, replacement is usually the smarter call.
When to Replace Wipers and Adaptors
Australian sun, heat, dust and sudden rain are hard on wiper rubber. Replace blades when they leave streaks, skip across the windscreen, chatter constantly, split at the edge or leave sections of glass uncleared. Most drivers benefit from checking them every few months and replacing them about every 6 to 12 months, depending on use and conditions.
The adaptor normally comes with a new blade kit, so there is rarely a reason to reuse a worn or damaged old connector. Keep the packaging until you have tested the blades, particularly if your vehicle uses a less common fitting. That gives you a simple reference if anything needs checking.
Clear vision should not depend on guesswork, a loose-fitting blade or a rushed trip to the parts shop. Match your wipers to your exact vehicle, confirm the connector locks properly and test them with washer fluid before the next wet drive. It is a quick bit of maintenance that makes every kilometre feel safer.
Posts Widget



Copyright 2026 © AutoCross. | Sitemap
